How to Set Up Bitcall as a Carrier in Vicidial
How to Set Up Bitcall as a Carrier in Vicidial

A complete guide to connecting your Vicidial server to Bitcall. This configuration has been Tested & Verified using the Bitcall SIP engine.
TIP
Security Recommendation: For high-volume call centers, we highly recommend using IP Authentication instead of SIP credentials. This prevents "Brute Force" attacks where hackers try to guess your SIP password. See our IP Auth Guide for more details.
What You Will Need
A working Vicidial/Vicibox installation (e.g., version 9 or 11)
Your Bitcall SIP credentials: username, password, and domain
Administrative access to the Vicidial web interface
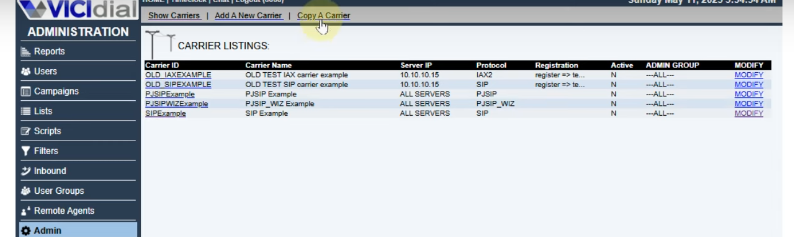
Step 1 : Create a New Carrier [Browser Step]
Open your browser and navigate to the Vicidial Admin page on your own server IP:
http://YOUR-SERVER-IP/vicidial/admin.phpTIP
Replace
YOUR-SERVER-IPwith the actual numbers of your VPS. If you don't know your IP, runhostname -Iin your terminal.(Note: Do not go to vicidial.org; you must use the IP address of your private VPS/Server)
Log in using your administrative credentials (default is often
6666/1234).Go to Admin -> Carriers.
Click Add a New Carrier.
Step 2 : Configure the Carrier Settings [Browser Step]
Fill in the following fields in the Admin Web UI exactly as shown:
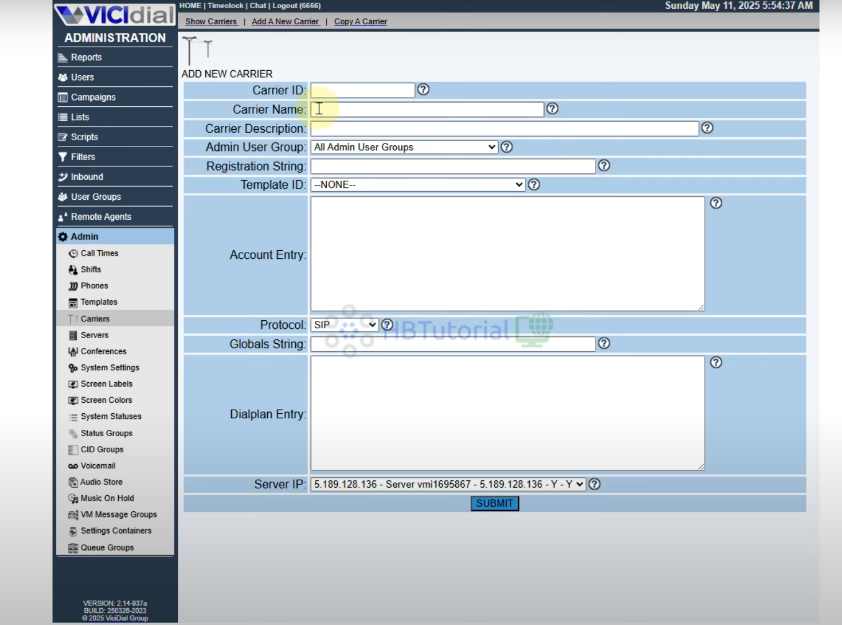
Carrier ID:
BITCALLCarrier Name:
Bitcall SIP TrunkRegistration String:
register => your-username:your-password@your-bitcall-domain(Replace with your real credentials)
Protocol:
SIPGlobals String:
BITCALL_TRUNK = SIP/bitcall
Step 3 : Add the Account Entry [Browser Step]
In the Account Entry text box within the Vicidial Admin UI, paste the following:
[bitcall]

type=peer

host=your-bitcall-domain

port=5060

username=your-username

secret=your-password

fromuser=your-username

fromdomain=your-bitcall-domain

insecure=invite

qualify=yes

dtmfmode=rfc2833

disallow=all

allow=ulaw

allow=alaw

nat=yes

canreinvite=no
⚠️ Replace your-username and your-password with your real Bitcall credentials.
Step 4 : Set the Dialplan Entry [Browser Step]
In the Dialplan Entry text box in the Vicidial Admin UI, paste the following routing rules:
exten => 9X.,1,AGI(agi://127.0.0.1:4577/calllog)

exten => 9X.,2,Dial(${BITCALLTRUNK}/${EXTEN:1},,To)

exten => _9X.,3,Hangup()
Step 5 : How to Verify the Connection [Terminal Step]
To be 100% sure your carrier is active, use the Terminal (SSH) Console:
Click Submit to save the carrier.
Log in to your Vicidial server via SSH.
Enter the Asterisk console:
asterisk -rVerified: You should see
your-bitcall-domain:5060with state Registered ✅.Real-time Debugging: Run this command to watch the SIP registration in real-time:
asterisk -rvvv | grep "Registration"
IMPORTANT
Switching / Conflicts: Vicidial uses Port 5060 for SIP. If you want to use FreeSWITCH or another PBX on the same server, you must stop the Vicidial SIP engine (Asterisk) first.
Expected Result
The Vicidial Admin screen and the Asterisk console both show Bitcall as Registered. Your agents can now begin dialing through the carrier.
Make Your First Test Call [Terminal Step]
Instead of setting up a full campaign, you can test the Bitcall trunk directly from the SSH terminal (Asterisk console):
Enter the Asterisk console:
asterisk -rvvvRun a manual test call:
channel originate SIP/bitcall/YOUR-MOBILE-NUMBER application Playback hello-world
⚠️ Replace +33612345678 with your mobile number.
Success: If your phone rings, the connection between Vicidial, Asterisk, and Bitcall is 100% operational.
Troubleshooting
Carrier not loading: Make sure the Carrier Status is set to Active in the Vicidial Admin UI.
Calls fail (Congestion): Check your Dialplan Entry and ensure the prefix (e.g.,
9) matches what your campaign is actually dialing. Also, verify your account balance.
How to Set Up Bitcall as a SIP Gateway in FreeSWITCH
How to Connect Asterisk to Bitcall The Complete SIP Authentication Guide for 2026